Bhlaraidh Extension
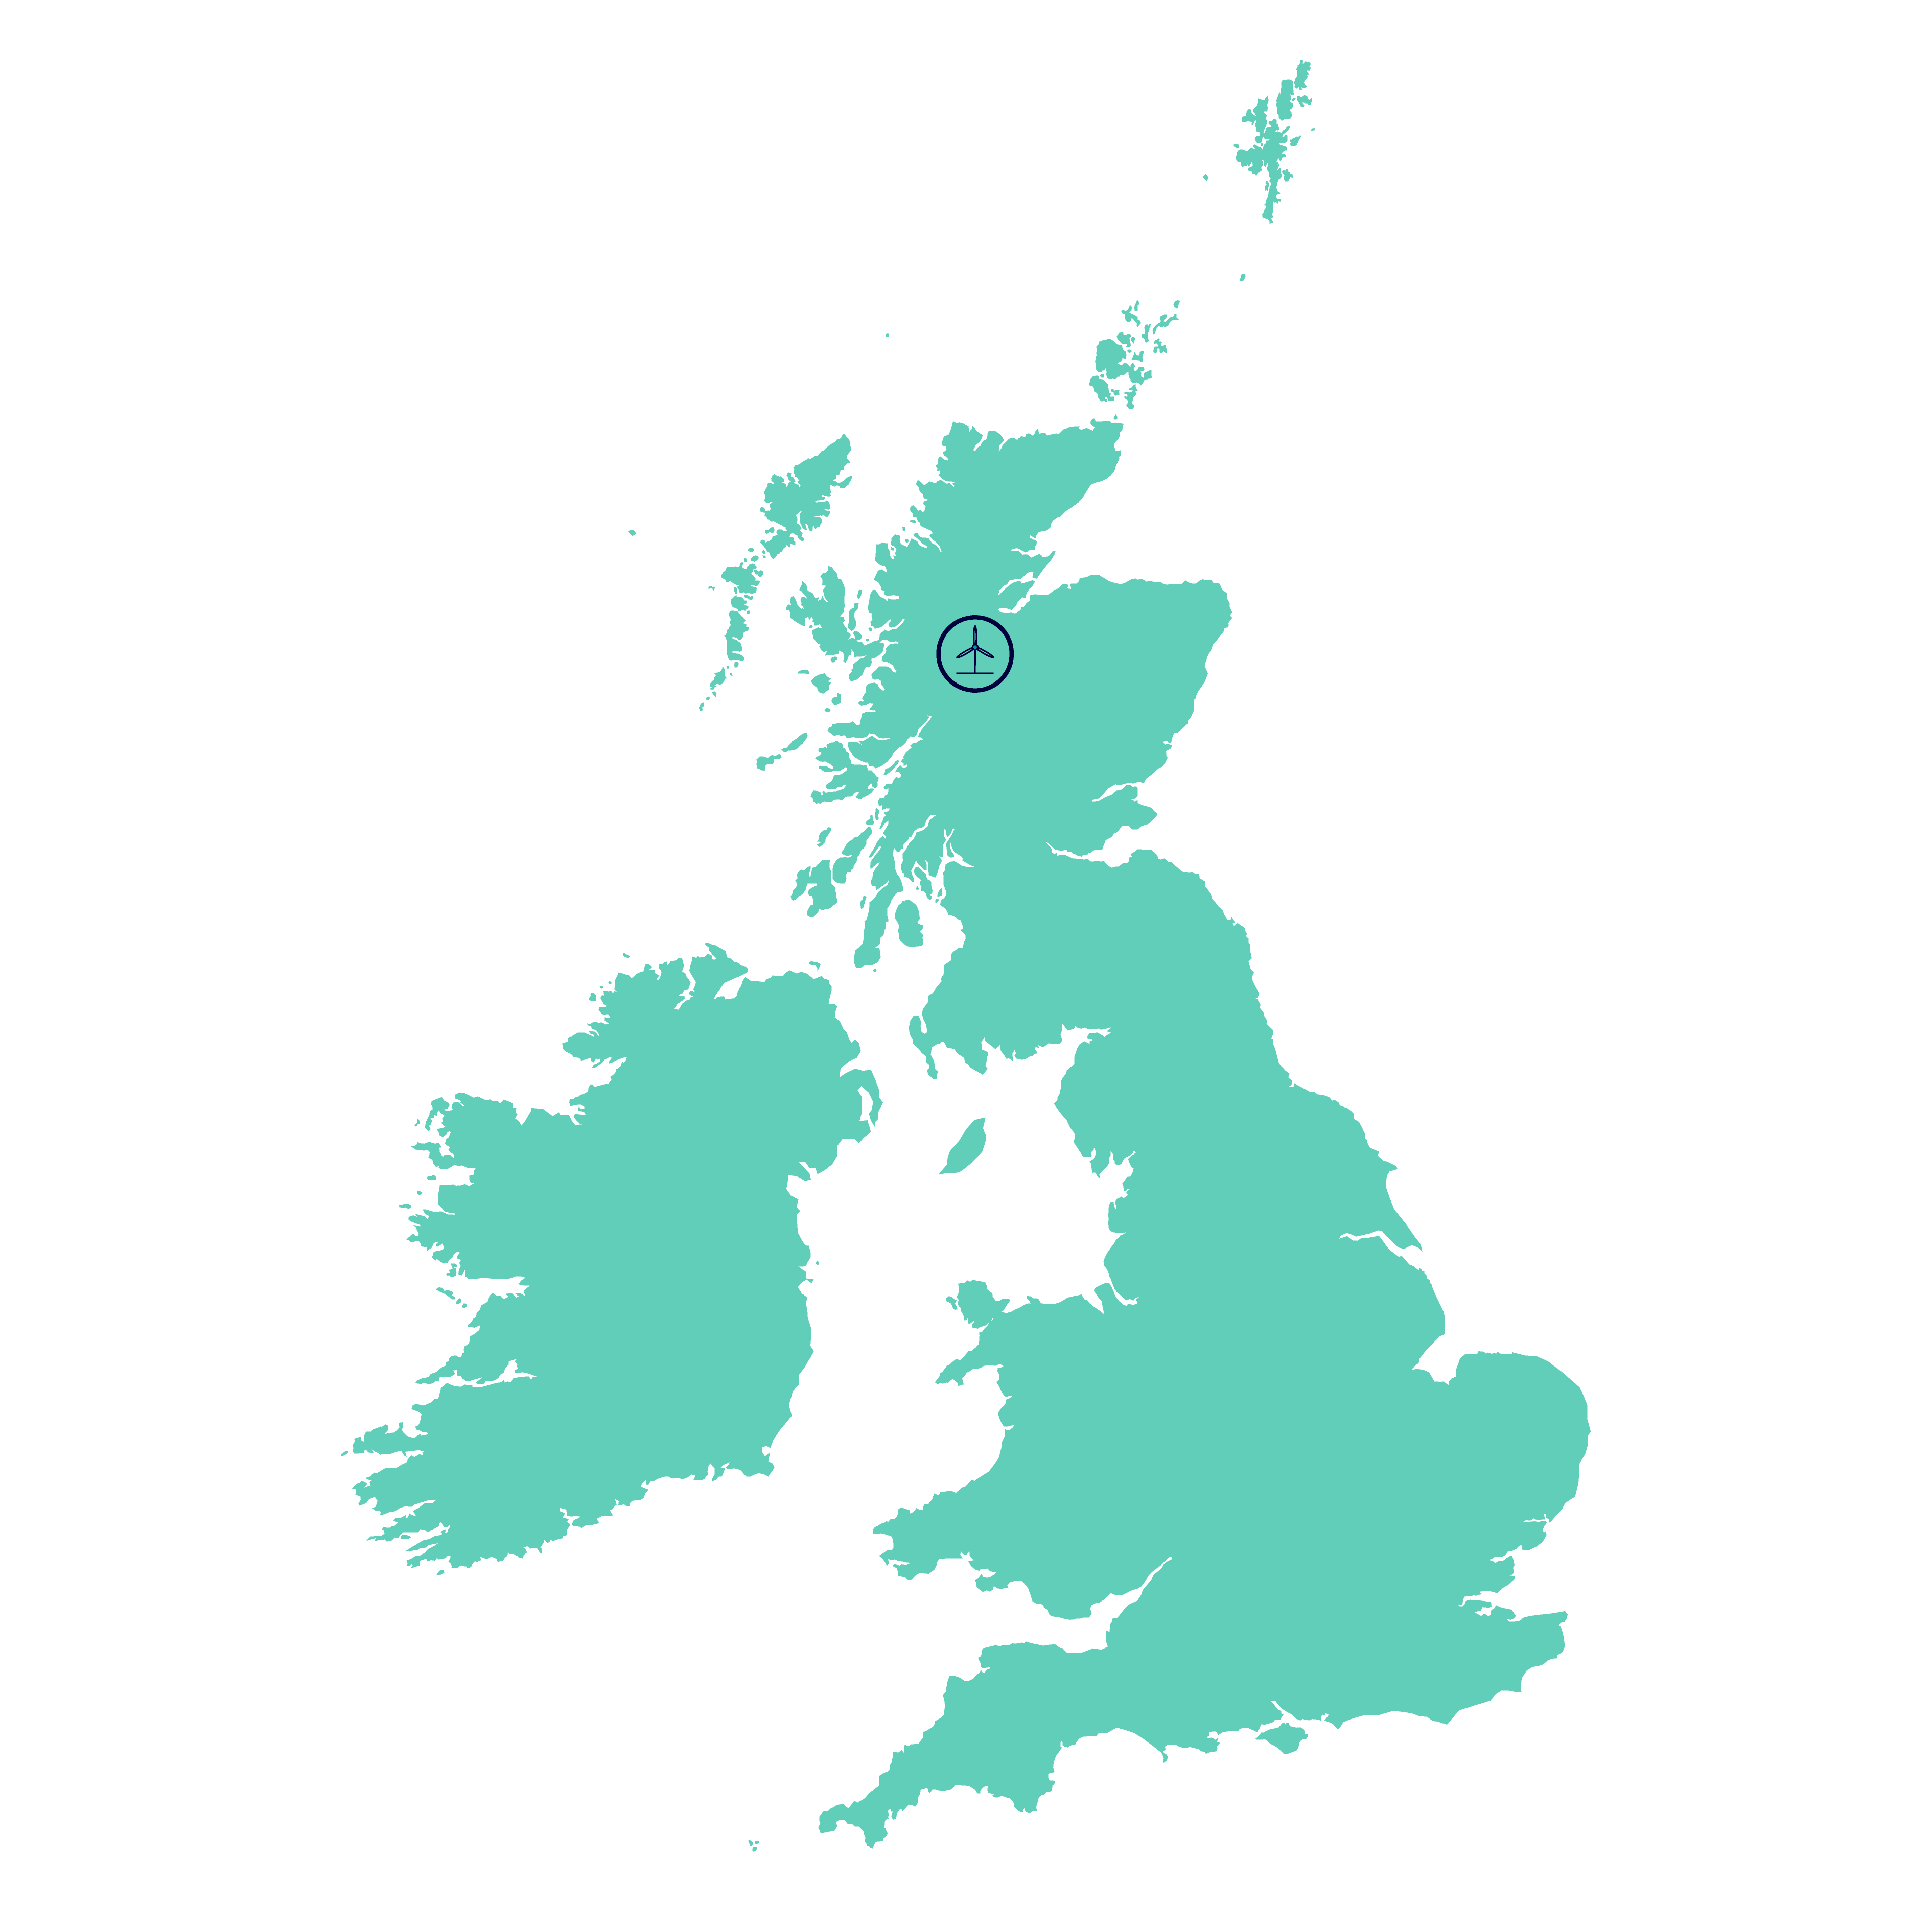
We have been awarded planning consent to build an up to 15 turbine extension to the existing Bhlaraidh Wind Farm, located on the Glenmoriston Estate, north-west of Invermoriston in the Great Glen.
A Section 36 application for Bhlaraidh Wind Farm Extension, consisting of up to 15 turbines with a tip height of up to 180 metres, was approved by the Scottish Government's Energy Consents Unit in August 2022.
A section 36C application to vary the consent was submitted to the Energy Consents Unit on 30th January 2026. This now sits with the Scottish Government and both local and statutory consultees for assessment and consideration. A link to the application on the Scottish Government's website is here.
It is anticipated that the Bhlaraidh Extension windfarm will generate approximately 108 megawatts (MW) with the existing 32 turbines at Bhlaraidh Wind Farm already generating up to 108 MW. The combined capacity could therefore generate approximately 216MW.
Section 36C Application – January 2026
Since the project’s consent in August 2022, our project team has been working to progress the project towards construction; however, due to a range of economic challenges, it will not be possible to progress the project in its current consented form.
Following a detailed project feasibility study and re-design, SSE has now submitted an application to vary the consent for the Bhlaraidh Extension Wind Farm Development. The variation requests an increase in the tip height of the turbines to increase the energy output from the site. The turbine locations remain largely unchanged from the Consented Development. The Varied Development application was submitted to the Scottish Government’s Energy Consents Unit (ECU) in January 2026.
This application is supported by a robust comparative Environmental Impact Assessment, new surveys and visuals where appropriate. Consultation with both the ECU through an official scoping request, and with local stakeholders at two public exhibitions has also been undertaken.
Chapter 2 - Design Iteration and Proposed Varied Development
Chapter 8 - Landscape And Visual
Chapter 9 - Hydrology And Hydrogeology
Chapter 10 - Geology And Soils
Chapter 11 - Noise And Shadow Flicker
Chapter 12 - Traffic And Transport
Chapter 13 - Socio Economics, Recreation And Tourism
Chapter 15 - Aviation And Radar
Chapter 16 - Schedule of Environmental Commitments
Figure 1.1 - Site Location Plan
Figure 1.3 - Wider Site Layout Plan
Figure 1.4 - Varied Development Vs Consented Development Layout
Figure 2.1A - T01 Infrastructure Design Review
Figure 2.1B - T02 Infrastructure Design Review
Figure 2.1C - T03 Infrastructure Design Review
Figure 2.1D - T04 Infrastructure Design Review
Figure 2.1E - T05 Infrastructure Design Review
Figure 2.1F - T06 Infrastructure Design Review
Figure 2.1G - T07 Infrastructure Design Review
Figure 2.1H - T08 Infrastructure Design Review
Figure 2.1I - T09 Infrastructure Design Review
Figure 2.1J - T10 Infrastructure Design Review
Figure 2.1K - T11 Infrastructure Design Review
Figure 2.1L - T12 Infrastructure Design Review
Figure 2.1M - T15 Infrastructure Design Review
Figure 2.1N - T16 Infrastructure Design Review
Figure 2.1O - T17 Infrastructure Design Review
Figure 2.2 - Typical Turbine Elevation
Figure 2.3 - Typical Turbine Foundation
Figure 2.4 - Typical Crane Hardstanding
Figure 2.5 - Indicative Substation Layout Elevations
Figure 2.6 - Indicative Substation Plan Layout
Figure 2.7 - Typical Access Track Cross Section
Figure 2.9 - Typical Construction Compound
Figure 2.10 - Environmental Constraints
Figure 5.1 - Designated Sites (Compressed)
Figure 5.2 - Phase 1 Habitats Proposed Varied Development
Figure 5.2.1 - Phase 1 Habitats
Figure 5.2.2 - Phase 1 Habitats
Figure 5.2.3 - Phase 1 Habitats
Figure 5.2.4 - Phase 1 Habitats
Figure 5.2.5 - Phase 1 Habitats
Figure 5.2.6 - Phase 1 Habitats
Figure 5.3 - NVC Communities Proposed Varied Development
Figure 5.3.1 - NVC Communities
Figure 5.3.2 - NVC Communities
Figure 5.3.3 - NVC Communities
Figure 5.3.4 - NVC Communities
Figure 5.3.5 - NVC Communities
Figure 5.3.6 - NVC Communities
Figure 5.4 - Bat Detector Locations And Bat Buffers
Figure 5.5A - Habitat Management Plan Detailed
Figure 5.5B - Habitat Management Plan Detailed
Figure 5.5C - Habitat Management Plan Detailed
Figure 5.5D - Habitat Management Plan Detailed
Figure 5.5E - Habitat Management Plan Detailed
Figure 5.5F - Habitat Management Plan Detailed
Figure 7.1 - Designated and Undesignated Heritage Assets
Figure 7.2A-B - Cultural Heritage VP1 Comparative Wireline From SM4567
Figure 7.3A-C - Cultural Heritage VP1 Cumulative Wireline From SM4567
Figure 7.4A-B - Cultural Heritage VP2 Comparative Wireline from Loch Ness
Figure 7.5 - Cultural Heritage vp2 Cumulative wireline from Loch Ness
Figure 7.6A-B - 2021EIA LVIA VP4 Cumulative wireline from AchtuieRdnrCreagNay
Figure 8.1 - Study Area with Proposed Varied Development ZTV A3
Figure 8.2 - Study Area with Proposed Varied Development ZTV A1
Figure 8.3 - Comparative ZTV of the Consented Development and Varied Development
Figure 8.4 - Designated and Protected Landscapes with Proposed Varied Development ZTV
Figure 8.5 - Landscape Character Types Detailed Study Area With Proposed Varied Dev ZTV
Figure 8.6 - Viewpoints with Proposed Varied Development ZTV A3
Figure 8.7 - Viewpoints with Proposed Varied Development ZTV A1
Figure 8.8 - Visual Receptors with Proposed Varied Development ZTV
Figure 8.9 - Cumulative Sites within 60km
Figure 8.10 - Cumulative Sites Included in the Assessment
Figure 8.11 - Cumulative ZTV Proposed Varied Development with all CLVIA Sites
Figure 8.12 - Cumulative ZTV Proposed Varied Development with all Operational Sites
Figure 8.13 - Cumulative ZTV Proposed Varied Dev with all Op and Consented Sites
Figure 8.14 - Cumulative ZTV Proposed Varied Development with Bhlaraidh
Figure 8.15 - Cumulative ZTV Proposed Varied Development with Chrathaich and Loch Liath
Figure 8.16 - Cumulative ZTV Proposed Varied Development with Corrimony and Fairburn
Figure 8.17 - Cumulative ZTV Proposed Dev with Corriemollie Lochluichart and Ext
Figure 8.18 - Cumulative ZTV Proposed Varied Development with Carn Fearna and Kirkan
Figure 8.19 - Cumulative ZTV Proposed Varied Development with Lynemore and Moy
Figure 8.20 - Cumulative ZTV Proposed Varied Development with Farr and Glen Kyllachy
Figure 8.21 - Cumulative ZTV Proposed Varied Development with Clune and Highland
Figure 8.22 - Cumulative ZTV Proposed Varied Development with Aberarder and Dunmaglass
Figure 8.23 - Cumulative ZTV Proposed Varied Dev with Corriegarth and Corriegarth 2
Figure 8.24 - Cumulative ZTV Proposed Varied Development with Cloiche and Stronelairg
Figure 8.25 - Cumulative ZTV Proposed Varied Development with Dell and Dell 2 Re-design
Figure 8.26 - Cumulative ZTV Proposed Varied Dev with Beinneun Extension and Culachy
Figure 8.27 - Cumulative ZTV Proposed Varied Dev with Millennium and Millennium East
Figure 8.28 - Cumulative ZTV Proposed Varied Dev with Bunloinn and Tomchrasky
Figure 9.1 - Hydrological Overview
Figure 9.2 - Hydrological Constraints & Watercourse Crossings C Vs P
Figure 9.3 - Hydrological Constraints & Watercourse Crossings P
Figure 10.1 - Extrapolated Peat Depth
Figure 10.1A - Extrapolated Peat Depth Detailed
Figure 10.1B - Extrapolated Peat Depth Detailed
Figure 10.1C - Extrapolated Peat Depth Detailed
Figure 10.1D - Extrapolated Peat Depth Detailed
Figure 10.2 - Peat Probe Depth
Figure 10.2A - Peat Probe Depth Detailed
Figure 10.2B - Peat Probe Depth Detailed
Figure 10.2C - Peat Probe Depth Detailed
Figure 1.1 - VP 1 Track to Loch Liath Location Plan
Figure 1.2A-C - VP 1 Track to Loch Liath Baseline Photo And Cumulative Wireline
Figure 1.3A - VP 1 Track To Loch Liath Proposed Varied Development Wireline
Figure 1.3B - VP 1 Track To Loch Liath Consented Development Wireline
Figure 1.4 - VP 1 Track To Loch Liath Photomontage
Figure 2.1 - VP 2 Old Bridge Invermoriston Location Plan
Figure 2.2A-B - VP 2 Invermoriston Baseline Photo and Cumulative Wireline
Figure 2.3A - VP 2 Old Bridge Invermoriston Proposed Varied Development Wireline
Figure 2.3B - VP 2 Old Bridge Invermoriston Consented Development Wireline
Figure 2.4 - VP 2 Old Bridge Invermoriston Photomontage
Figure 2.5 - VP 2 Old Bridge Invermoriston Nighttime Photomontage
Figure 3.1 - VP 3 Meall Fuar Mhonaidh Location Plan
Figure 3.2A-D - VP 3 Meall Fuar Mhonaidh Baseline Photo And Cumulative Wireline
Figure 3.3A - VP 3 Meall Fuar Mhonaidh Proposed Varied Development Wireline
Figure 3.3B - VP 3 Meall Fuar Mhonaidh Consented Development Wireline
Figure 3.4 - VP 3 Meall Fuar Mhonaidh Photomontage
Figure 3.5 - VP 3 Meall Fuar Mhonaidh Visible Aviation Lighting Photomontage
Figure 4.1 - VP 5 Suidhe Viewpoint B862 Location Plan
Figure 4.2A-B - VP 5 Suidhe View B862 Baseline Photo And Cumulative Wireline (1)
Figure 4.3A - VP 5 Suidhe Viewpoint B862 Proposed Varied Development Wireline
Figure 4.3B - VP 5 Suidhe Viewpoint B862 Consented Development Wireline
Figure 4.4 - VP 5 Suidhe Viewpoint B862 Photomontage
Figure 4.5 - VP 5 Suidhe Viewpoint B862 Visible Aviation Lighting Photomontage
Figure 5.1 - VP 6 Summit By Suidhe View B862 Location Plan
Figure 5.2A-C - VP 6 Summit By Suidhe View B862 Baseline Photo And Cumulative Wireline
Figure 5.3A - VP 6 Summit By Suidhe View B862 Proposed Development Wireline
Figure 5.3B - VP 6 Summit By Suidhe View B862 Consented Development Wireline
Figure 5.4 - VP 6 Summit By Suidhe View B862 Photomontage
Figure 6.1 - VP 7 B862 South Of Foyers Location Plan
Figure 6.2A-C - VP 7 B862 South Of Foyers Baseline Photo And Cumulative Wireline
Figure 6.3A - VP 7 B862 South Of Foyers Proposed Varied Development Wireline
Figure 6.3B - VP 7 B862 South Of Foyers Consented Development Wireline
Figure 6.4 - VP 7 B862 South Of Foyers Photomontage
Figure 7.1 - VP 8 Lochside Picnic Layby On B852 Location Plan
Figure 7.2A - VP 8 Loch Picnic Layby B852 Baseline Photo And Cumulative Wireline
Figure 7.3A - VP8 Lochside Picnic Layby On B852 Proposed Varied Development Wireline
Figure 7.3B - VP8 Lochside Picnic Layby On B852 Consented Development Wireline
Figure 7.4 - VP 8 Lochside Picnic By Layby On B852 Photomontage
Figure 8.1 - VP 10 Great Glen Way Near Carn A'bhodaich Location Plan
Figure 8.2A-B - VP10 Great Glen Way Near Carn A'bhodaich Baseline Photo And Cumulative Wireline
Figure 8.3A - VP 10 Great Glen Way Near Carn A'bhodaich Proposed Varied Development Wireline
Figure 8.3B - VP 10 Great Glen Way Near Carn A'bhodaich Consented Development Wireline
Figure 8.4 - VP 10 Great Glen Way Near Carn A'bhodaich Photomontage
Figure 9.1 - VP 12 Creag Dhubh Location Plan
Figure 9.2A-B - VP 12 Creag Dhubh Baseline Photo And Cumulative Wireline
Figure 9.3A - VP 12 Creag Dhubh Proposed Varied Development Wireline
Figure 9.3B - VP 12 Creag Dhubh Consented Development Wireline
Figure 9.4 - VP 12 Creag Dhubh Photomontage
Figure 10.1 - VP 14 Meall Dubh Location Plan
Figure 10.2A-D - VP 14 Meall Dubh Baseline Photo And Cumulative Wireline
Figure 10.3A - VP 14 Meall Dubh Proposed Varied Development Wireline
Figure 10.3B - VP 14 Meall Dubh Consented Development Wireline
Figure 10.4 - VP 14 Meall Dubh Photomontage
Figure 11.1 - VP 15 Poll Gormack Hill Location Plan
Figure 11.2A-C - VP15 Poll Gormack Hill Baseline Photo And Cumulative Wireline
Figure 11.3A - VP15 Poll Gormack Hill Proposed Varied Development Wireline
Figure 11.3B - VP 15 Poll Gormack Hill Consented Development Wireline
Figure 11.4 - VP 15 Poll Gormack Hill Photomontage
Figure 12.1 - VP 17 South Of Dores Location Plan
Figure 12.2 - VP 17 B862 South Of Dores Baseline Photo And Cumulative Wireline
Figure 12.3A - VP 17 B862 South Of Dores Proposed Varied Development Wireline
Figure 12.3B - VP 17 B862 South Of Dores Consented Development Wireline
Figure 12.4 - VP 17 B862 South Of Dores Photomontage
Figure 13.1 - VP 20 Path North Of Affric Lodge Location Plan
Figure 13.2 - VP 20 Path North Of Affric Lodge Baseline Photo And Cumulative Wireline
Figure 13.3A VP 20 Path North Of Affric Lodge Proposed Varied Development Wireline
Figure 13.3B - VP 20 Path North Of Affric Lodge Consented Development Wireline
Figure 13.4 - VP 20 Path North Of Affric Lodge Photomontage
Figure 14.1 - VP 21 Toll Creagach Location Plan
Figure 14.2A-B - VP 21 Toll Creagach Baseline Photo And Cumulative Wireline
Figure 14.3A - VP 21 Toll Creagach Proposed Varied Development Wireline
Figure 14.3B - VP 21 Toll Creagach Consented Development Wireline
Figure 14.4 - VP 21 Toll Creagach Photomontage
Figure 14.5 - VP 21 Toll Creagach Visible Aviation Lighting Photomontage
Figure 15.1 - VP 26 A87 Bun Loyne Location Plan
Figure 15.2A-B - VP 26 A87 Bun Loyne Baseline Photo And Cumulative Wireline
Figure 15.3A - VP 26 A87 Bun Loyne Proposed Varied Development Wireline
Figure 15.3B - VP 26 A87 Bun Loyne Consented Development Wireline
Figure 1.1 - VP 1 Track To Loch Liath Location Plan
Figure 1.2-1.3B - VP 1 Track To Loch Liath
Figure 1.4-1.5 - VP 1 Track To Loch Liath
Figure 2.1 - VP 2 Old Bridge, Invermoriston Location Plan
Figure 2.2-2.3B - VP 2 Old Bridge, Invermoriston
Figure 2.4-2.5 - VP 2 Old Bridge, Invermoriston
Figure 3.1 - VP 3 Meall Fuar Mhonaidh Location Plan
Figure 3.2-3.3B - VP 3 Meall Fuar Mhonaidh
Figure 3.4-3.5 - VP 3 Meall Fuar Mhonaidh
Figure 4.1 - VP 5 Suidhe Viewpoint B862 Location Plan
Figure 4.2-4.3B - VP 5 Suidhe Viewpoint B862
Figure 4.4-4.5 - VP 5 Suidhe Viewpoint B862
Figure 10.1 - VP 14 Meall Dubh Location Plan
Figure 10.2-10.3B - VP 14 Meall Dubh
Figure 10.4-10.5 - VP 14 Meall Dubh
Figure 11.1 - VP 15 Poll Gormack Hill Location Plan
Figure 11.2-11.3B - VP 15 Poll Gormack Hill
Figure 11.4-11.5 - VP 15 Poll Gormack Hill
Figure 12.1 - VP 17 B862 South Of Dores Location Plan
Figure 12.2-12.3B - VP 17 B862 South Of Dores
Figure 12.4-12.5 - VP 17 B862 South Of Dores
Figure 13.1 - VP 20 Path North Of Affric Lodge Location Plan
Figure 13.2-13.3B - VP 20 Path North Of Affric Lodge
Figure 14.1 - VP 21 Toll Creagach Location Plan
Figure 14.2-14.3B - VP 21 Toll Creagach
Figure 14.4-14.5 - VP 21 Toll Creagach
Figure 15.1 - VP 26 A87 Bun Loyne Location Plan
3.3 - Further Scoping Consultation
3.5 - Consultee Responses To Gatecheck
3.6 - Planning Condition Summary
3.6A - Habitat Management Plan - Part 1
3.6A - Habitat Management Plan - Part 2
3.6A - Habitat Management Plan - Part 3
3.6A - Habitat Management Plan - Part 4
3.6A - Habitat Management Plan - Part 5
3.6A - Habitat Management Plan - Part 6
3.6A - Habitat Management Plan - Part 7
3.6A - Habitat Management Plan - Part 8
3.6A - Habitat Management Plan - Part 9
3.6A - Habitat Management Plan - Part 10
3.6C - Biodiversity Net Gain Report
3.6F - Private Water Supply Risk Assessment
3.6H - Species Protection Plan
3.6I - Breeding Bird Protection Plan
7.1 - Cultural Heritage Gazetteer Stage - 1 Setting Assessment
8.1 - Technical Methodologies for Visual Representation
8.2 - Summary of Scoping Process
8.3 - Assessment of Landscape Character Types
8.4 - Assessment of Designated and Protected Landscapes
8.5 - Existing and Proposed Wind Energy Developments within 60km
8.6 - Visual Assessment Tables
8.7 - Cumulative Visual Assessment Tables
8.8 - Cumulative Landscape Assessment Tables
8.9 - Landscape and Visual Assessment of Aviation Lighting
8.9 - Figure 8.9.1A - Visible Aviation Lighting Hub Height ZTV A3
8.9 - Figure 8.9.1B - Visible Aviation Lighting Hub Height ZTV A1
8.9 - Figure 8.9.2 - Visible Aviation Lighting Theoretical Intensity ZTV
8.9 - Figure 8.9.3 - Aviation Lighting With Theoretical Intensity ZTV
8.9 - Figure 8.9.4 - Aviation Lighting Designated with Theoretical Intensity ZTV
8.9 - Figure 8.9.5 - Aviation Lighting Visual Receptors Theoretical Intensity ZTV
8.10 - Appraisal of the Highland Council's Criteria
9.1 - Proposed Varied Development Watercourse Crossing Schedule
12.1 - Construction Traffic Management Plan - Part 1
12.1 - Construction Traffic Management Plan - Part 2
12.1 - Construction Traffic Management Plan - Part 3
12.1 - Construction Traffic Management Plan - Part 4
14.1 - Carbon Calculator - Part 1
14.1 - Carbon Calculator - Part 2
14.1 - Carbon Calculator - Part 3
14.1 - Carbon Calculator - Part 5
15.1 - Bhlaraidh Ext Aviation Lighting Assessment Report (WFLFAC)
15.2 - CAA Response To WFLFAC Aviation Lighting Assessment Report
Section 36 consent - August 2022
A Section 36 application for Bhlaraidh Wind Farm Extension, consisting of up to 15 turbines with a tip height of up to 180 metres, was approved by the Scottish Government's Energy Consents Unit in August 2022.
The application was accompanied by a full Environmental Impact Assessment (EIA) report and other supporting documents and a subsequent Additional Information Report (AIR).
It is anticipated that the proposed development will generate approximately 84 megawatts (MW), while the existing 32 turbines at Bhlaraidh Wind Farm already generate 108 MW. The combined capacity could therefore generate approximately 192MW.
The full EIA report, supporting application documents and the AIR can be found on this webpage, via the links below, or on the Scottish Governments Energy Consent Unit's website here, using application reference number ECU00001900.
The public notices for the EIAR and the AIR can be viewed by clicking this link
Notice of Planning Consent
Environmental Impact Assessment Documents (August 2021)
Chapter 2 - Design Iteration and Proposed Development
Chapter 7 - Archaeology and Cultural Heritage
Chapter 8 - Landscape and Visual
Chapter 9 - Hydrology and Hydrogeology
Chapter 10 - Geology and Soils
Chapter 12 - Traffic and Transport
Chapter 13 - Socio-Economic Tourism and Recreation
Chapter 15 - Aviation and Radar
Figure 1.1 - Site Location Plan
Figure 1.2 - Wider Layout Plan
Figure 2.7 - Typical Turbine Elevation
Figure 2.8 - Typical Turbine Foundation
Figure 2.9 - Typical Crane Hardstanding
Figure 2.10 - Typical Access Track Cross Section
Figure 2.11 - Indicative Substation Layout - Elevations
Figure 2.12 - Indicative On-Site Substation
Figure 2.14 - Typical Construction Compound
Figure 5.7 - Bat Detector Locations
Figure 5.8 - Peat Condition Assessments
Figure 5.9 - Peat Compartments and NVC
Figure 5.10 - Peat Compartments and Phase 1
Figure 5.11 - Outline HMP Areas
Figure 6.1 - Vantage Points and Viewsheds 2018/19
Figure 6.2 - Vantage Points and Viewsheds 2019/20
Figure 6.3 - Designated Sites within 20km
Figure 6.4 - Site Boundary and Study Areas
Figure 6.5 - Survey Areas 2019/20
Figure 6.6 - Black Grouse Lek Locations 2009-19
Figure 6.7 - Flight Activity Golden Eagle 2018/19
Figure 6.8 - Flight Activity Golden Eagle 2019/20
Figure 6.9 - Flight Activity Other Raptors 2018-20
Figure 6.10 - Golden Plover 2009-20
Figure 6.11 - Other Waders 2009-20
Figure 6.12 - Cumulative Impact Assessment NHZ
Figure 7.1 - Designated Heritage Assets
Figure 7.2 - Designated Heritage Assets with ZTV
Figure 7.3 - Cultural Heritage Viewpoints
Figure 9.2 - Hydrological Overview
Figure 9.3 - Environmental Constraints
Figure 9.4 - Watercourse Crossings
Figure 9.7 - Private Water Supplies
Figure 10.1 - Published Solid Geology
Figure 10.3 - Carbon and Peatland Classification
Figure 11.1 - Noise Monitoring and Assessment Locations
Figure 11.2 - Cumulative Turbine Locations
Figure 7.4 a-c - Cultural Heritage Viewpoint 1
Figure 7.5 - Cultural Heritage Viewpoint 1
Figure 7.6 - Cultural Heritage Viewpoint 2
Figure 7.7 - Cultural Heritage Viewpoint 2
Figure 8.1.1 - Study Area with ZTV
Figure 8.2.1 - Designated and Protected Landscape
Figure 8.2.2 - Designated and protected Landscapes with ZTV
Figure 8.3.1 - Map of Relative Wildness and WLAs
Figure 8.3.2 - Map of Relative Wildness and WLAs with ZTV
Figure 8.4.1 - Landscape of Character Types
Figure 8.4.2 - Landscape of Character Types with ZTV
Figure 8.4.3 - Landscape of Character Types with ZTV (25km)
Figure 8.5.1 - Viewpoints with ZTV
Figure 8.5.2 - Viewpoints with ZTV (25km)
Figure 8.6.1 - Visual Receptors
Figure 8.6.2 - Visual Receptors with ZTV
Figure 8.6.3 - Visual Receptors with ZTV (25km)
Figure 8.7.1 - Cumulative Sites within 60km Search
Figure 8.7.2 - Cumulative Sites Included within the Assessment
Figure 8.8.1 - Cumulative ZTV - Proposed Development with All CLVIA Sites
Figure 8.82 - Cumulative ZTV - Prop Development with Operational Construction Sites
Figure 8.8.3 - Cumulative ZTV - Prop Development with Operational Construction Consented Sites
Figure 8.8.4 - Cumulative ZTV - Proposed Development with Beinneun (and Ext)
Figure 8.8.5 - Cumulative ZTV - Proposed Development with Bhlaraidh
Figure 8.8.6 - Cumulative ZTV - Proposed Development with Corriemoillie
Figure 8.8.7 - Cumulative ZTV - Proposed Development with Corriegarth
Figure 8.8.8 - Cumulative ZTV - Proposed Development with Corrimony
Figure 8.8.9 - Cumulative ZTV - Proposed Development with Dunmaglass
Figure 8.8.10 - Cumulative ZTV - Proposed Development with Fairburn
Figure 8.8.11 - Cumulative ZTV - Proposed Development with Farr
Figure 8.8.12 - Cumulative ZTV - Proposed Development with Glen Kyllachy
Figure 8.8.13 - Cumulative ZTV - Proposed Development with Lochluichart (and Ext)
Figure 8.8.14 - Cumulative ZTV - Proposed Development with Millennium
Figure 8.8.15 - Cumulative ZTV - Proposed Development with Moy
Figure 8.8.16 - Cumulative ZTV - Proposed Development with Stronelairg
Figure 8.8.17 - Cumulative ZTV - Proposed Development with Aberarder
Figure 8.8.18 - Cumulative ZTV - Proposed Development with Dell
Figure 8.8.19 - Cumulative ZTV - Proposed Development with Lochluichart Ext II
Figure 8.8.20 - Cumulative ZTV - Proposed Development with Millennium South
Figure 8.8.21 - Cumulative ZTV - Proposed Development with Cloiche
Figure 8.8.22 - Cumulative ZTV - Proposed Development with Corriegarth 2
Figure 8.8.23 - Cumulative ZTV - Proposed Development with Glenshero
Figure 8.8.24 - Cumulative ZTV - Proposed Development with Kirkan
Figure 8.9.1 VP1 - Track to Loch Liath - Location Plan
Figure 8.9.2.1-3 - VP1 Track to Loch Liath - Baseline & Cumulative
Figure 8.9.3 - VP1 Track to Loch Liath - Wireline
Figure 8.9.4 - VP1 Track to Loch Liath - Photomontage
Figure 8.10.1 - VP2 Old Bridge, Invermoriston - Location Plan
Figure 8.10.2.1-2 - VP2 Old Bridge, Invermoriston - Baseline & Cumulative
Figure 8.10.3 - VP2 Old Bridge, Invermoriston - Wireline
Figure 8.10.4 - VP2 Old Bridge, Invermoriston - Photomontage
Figure 8.11.1 VP3 Meall Fuar-mhonaidh - Location Plan
Figure 8.11.2.1-4 - VP3 Meall Fuar-mhonaidh - Baseline & Cumulative
Figure 8.11.3 - VP3 Meall Fuar-mhonaidh - Wireline
Figure 8.11.4 - VP3 Meall Fuar-mhonaidh - Photomontage
Figure 8.12.1 VP4 Achtuie Road near Creag Nay - Location Plan
Figure 8.12.2.1-2 - VP4 Achtuie Road near Creag Nay - Baseline & Cumulative
Figure 8.12.3 - VP4 Achtuie Road near Creag Nay - Wireline
Figure 8.12.4 - VP4 Achtuie Road near Creag Nay - Photomontage
Figure 8.13.1 VP5 Suidhe Viewpoint, B862 - Location Plan
Figure 8.13.2.1-2 - VP5 Suidhe Viewpoint, B862 - Baseline & Cumulative
Figure 8.13.3 - VP5 Suidhe Viewpoint, B862 - Wireline
Figure 8.13.4 - VP5 Suidhe Viewpoint, B862 - Photomontage
Figure 8.14.1 VP6 Summit by Suidhe Viewpoint, B862 - Location Plan
Figure 8.14.2.1-3 - VP6 Summit by Suidhe VP, B862 - Baseline & Cumulative
Figure 8.14.3 - VP6 Summit by Suidhe Viewpoint, B862 - Wireline
Figure 8.14.4 - VP6 Summit by Suidhe Viewpoint, B862 - Photomontage
Figure 8.15.1 - VP7 B862 south of Foyers - Location Plan
Figure 8.15.2.1-3 - VP7 B862 south of Foyers - Baseline & Cumulative
Figure 8.15.3 - VP7 B862 south of Foyers - Wireline
Figure 8.15.4 - VP7 B862 south of Foyers - Photomontage
Figure 8.16.1 VP8 Lochside picnic layby on B852 - Location Plan
Figure 8.16.2 - VP8 Lochside picnic layby on B852 - Baseline & Cumulative
Figure 8.16.3 - VP8 Lochside picnic layby on B852 - Wireline
Figure 8.16.4 - VP8 Lochside picnic layby on B852 - Photomontage
Figure 8.17.1 - VP9 Carn na Saobhaidhe - Location Plan
Figure 8.17.2.1-3 - VP9 Carn na Saobhaidhe - Baseline & Cumulative
Figure 8.17.3 - VP9 Carn na Saobhaidhe - Wireline
Figure 8.17.4 - VP9 Carn na Saobhaidhe - Photomontage
Figure 8.18.1 - VP10 Great Glen Way near Carn a'Bhodaich - Location Plan
Figure 8.18.2.1-2 - VP10 GGW nr Carn a'Bhodaich - Baseline & Cumulative
Figure 8.18.3 - VP10 Great Glen Way near Carn a'Bhodaich - Wireline
Figure 8.18.4 - VP10 Great Glen Way near Carn a'Bhodaich - Photomontage
Figure 8.19.1 - VP11 Meall Mor, Glen Affric - Location Plan
Figure 8.19.2.1-2 - VP11 Meall Mor, Glen Affric - Baseline & Cumulative
Figure 8.19.3 - VP11 Meall Mor, Glen Affric - Wireline
Figure 8.19.4 - VP11 Meall Mor, Glen Affric - Photomontage
Figure 8.20.1 - VP12 Creag Dhubh - Location Plan
Figure 8.20.2.1-2 - VP12 Creag Dhubh - Baseline & Cumulative
Figure 8.20.3 - VP12 Creag Dhubh - Wireline
Figure 8.20.4 - VP12 Creag Dhubh - Photomontage
Figure 8.21.1 - VP13 Sgùrr nan Conbhairean - Location Plan
Figure 8.21.2.1-2 - VP13 Sgùrr nan Conbhairean - Baseline & Cumulative
Figure 8.21.3 - VP13 Sgùrr nan Conbhairean - Wireline
Figure 8.21.4 - VP13 Sgùrr nan Conbhairean - Photomontage
Figure 8.22.1 - VP14 Meall Dubh - Location Plan
Figure 8.22.2.1-3 - VP14 Meall Dubh - Baseline & Cumulative
Figure 8.22.3 - VP14 Meall Dubh - Wireline
Figure 8.22.4 - VP14 Meall Dubh - Photomontage
Figure 8.23.1 - VP15 Poll-gormack Hill - Location Plan
Figure 8.23.2.1-3 - VP15 Poll‐gormack Hill - Baseline & Cumulative
Figure 8.23.3 - VP15 Poll‐gormack Hill - Wireline
Figure 8.23.4 - VP15 Poll‐gormack Hill - Photomontage
Figure 8.24.1 - VP16 Geal Charn - Location Plan
Figure 8.24.2.1-3 - VP16 Geal Charn - Baseline & Cumulative
Figure 8.24.3 - VP16 Geal Charn - Wireline
Figure 8.24.4 - VP16 Geal Charn - Photomontage
Figure 8.25.1 - VP17 B862 south of Dores - Location Plan
Figure 8.25.2 - VP17 B862 south of Dores - Baseline & Cumulative
Figure 8.25.3 - VP17 B862 south of Dores - Wireline
Figure 8.25.4 - VP17 B862 south of Dores - Photomontage
Figure 8.26.1 - VP18 Track near Dun Fhamhair fort - Location Plan
Figure 8.26.2.1-2 - VP18 Track nr Dun Fhamhair fort - Baseline & Cumulative
Figure 8.26.3 - VP18 Track near Dun Fhamhair fort - Wireline
Figure 8.26.4 - VP18 Track near Dun Fhamhair fort - Photomontage
Figure 8.27.1 - VP19 Path north of Loch Affric - Location Plan
Figure 8.27.2 - VP19 Path north of Loch Affric - Baseline & Cumulative
Figure 8.27.3 - VP19 Path north of Loch Affric - Wireline
Figure 8.27.4 - VP19 Path north of Loch Affric - Photomontage
Figure 8.28.1 VP20 Path north of Affric Lodge - Location Plan
Figure 8.28.2 - VP20 Path north of Affric Lodge - Baseline & Cumulative
Figure 8.28.3 - VP20 Path north of Affric Lodge - Wireline
Figure 8.28.4 - VP20 Path north of Affric Lodge - Photomontage
Figure 8.29.1 VP21 Toll Creagach - Location Plan
Figure 8.29.2.1-2 - VP21 Toll Creagach - Baseline & Cumulative
Figure 8.29.3 - VP21 Toll Creagach - Wireline
Figure 8.29.4 - VP21 Toll Creagach - Photomontage
Figure 8.30.1 VP22 Sgurr na Ruaidhe - Location Plan
Figure 8.30.2.1-3 - VP22 Sgurr na Ruaidhe - Baseline & Cumulative
Figure 8.30.3 - VP22 Sgurr na Ruaidhe - Wireline
Figure 8.30.4 - VP22 Sgurr na Ruaidhe - Photomontage
Figure 8.31.1 - VP23 An Cabar (Ben Wyvis) - Location Plan
Figure 8.31.2.1-3 - VP23 An Cabar (Ben Wyvis) - Baseline & Cumulative
Figure 8.31.3 - VP23 An Cabar (Ben Wyvis) - Wireline
Figure 8.31.4 - VP23 An Cabar (Ben Wyvis) - Photomontage
Figure 8.32.1 - VP24 NCN1 Between Dingwall and Evanton - Location Plan
Figure 8.32.2.1-2 - VP24 NCN1 btw Dingwall and Evanton - Baseline & Cumulative
Figure 8.32.3 - VP24 NCN1 Between Dingwall and Evanton - Wireline
Figure 8.32.4 - VP24 NCN1 Between Dingwall and Evanton - Photomontage
Figure 8.33.1 - VP25 Minor road near Tore - Location Plan
Figure 8.33.2.1-2 - VP25 Minor road near Tore - Baseline & Cumulative
Figure 8.33.3 - VP25 Minor road near Tore - Wireline
Figure 8.33.4 - VP25 Minor road near Tore - Photomontage
Figure 8.34.1 - VP26 A87 Bun Loyne - Location Plan
Figure 8.34.2.1-2 - VP26 A87 Bun Loyne - Baseline & Cumulative
Figure 8.35.1-6 - VP1 Track to Loch Liath
Figure 8.36.1-6 - VP2 Old Bridge, Invermoriston
Figure 8.37.1-6 - VP3 Meall Fuar-mhonaidh
Figure 8.38.1-6 - VP4 Achtuie Road near Creag Nay
Figure 8.39.1-6 - VP5 Suidhe Viewpoint, B862
Figure 8.40.1-6 - VP6 Summit by Suidhe Viewpoint, B862
Figure 8.41.1-6 - VP7 B862 south of Foyers
Figure 8.42.1-6 - VP8 Lochside picnic layby on B852
Figure 8.43.1-6 - VP9 Carn na Saobhaidhe
Figure 8.44.1-6 - VP10 Great Glen Way nr Carn a' Bhodaich
Figure 8.45.1-6 - VP11 Meall Mor, Glen Affric
Figure 8.46.1-6 - VP12 Creag Dhubh
Figure 8.47.1-6 - VP13 Sgurr nan Conbhairean
Figure 8.48.1-6 - VP14 Meall Dubh
Figure 8.49.1-6 - VP15 Poll-gormack Hill
Figure 8.50.1-6 - VP16 Geal Charn
Figure 8.5.1 - Viewpoints with ZTV
Figure 8.51.1-6 - VP17 B862 south of Dores
Figure 8.52.1-6 - VP18 Track near Dun Fhamhair fort
Figure 8.53.1-6 - VP19 Path north of Loch Affric
Figure 8.54.1-6 - VP20 Path north of Affric Lodge
Figure 8.55.1-6 - VP21 Toll Creagach
Figure 8.56.1-6 - VP22 Sgurr na Ruaidhe
Figure 8.57.1-6 - VP23 An Cabar (Ben Wyvis)
Figure 8.58.1-6 - VP24 NCN1 Between Dingwall and Evanton
Figure 8.59.1-6 - VP25 Minor road near Tore
Figure 8.60.1-6 - VP26 A87 Bun Loyne
Figure 8.7.2 - Cumulative Sites Included within the Assessment
Appendix 3.2 - Scoping Opinion
Appendix 3.3 - Gatecheck 1 Report
Appendix 3.4 - Gatecheck Responses
Appendix 3.5 - Post Scoping Consultation
Appendix 3.6 - Pre-App Advice Pack
Appendix 5.1 - Methodology and Results for Baseline
Appendix 5.3 - Bat Survey Methods and Results
Appendix 5.4 - Fish Habitat and Population Baseline Survey
Appendix 5.5 - Peatland Condition Assessment
Appendix 5.6 - Deer Management Plan
Appendix 5.7 - Outline Habitat Management Plan
Appendix 5.8 - Operational Bhlaraidh Deer Management Plan
Appendix 6.3 - Golden Eagle Population Modelling
Appendix 6.4 - Habitats Regulation Appraisal
Appendix 8.1 - Technical Methodologies for Visual Representation
Appendix 8.2 - Landscape and Visual Scoping Appraisal
Appendix 8.3 - Existing and Proposed Wind Energy Developments within 60km
Appendix 8.4 - Assessment of Designated and Protected Landscapes
Appendix 8.5 - Assessment of Landscape Character Types
Appendix 8.6 - Visual Assessment Tables
Appendix 8.7 - Cumulative Landscape Assessment Tables
Appendix 8.8 - Cumulative Visual Assessment Tables
Appendix 8.9 - Appraisal of THC's Criteria
Appendix 9.1 - Watercourse Crossing Schedule
Appendix 9.2 - Flood Risk Assessment
Appendix 10.1 - Borrow Pit Assessment Report
Appendix 10.2 - Peat Stability Risk Assessment
Appendix 10.3 - Peat Management Plan
Appendix 11.1 - Operational Noise Report
Appendix 12.1 - Transport Assessment
Appendix 12.2 - Route Survey Report
Appendix 14.1 - Carbon Calculator Inputs
Additional Information Report (March 2022)
Appendix 9.1 Updated Watercourse Crossing Schedule
Appendix 14.1 Carbon Calculator Inputs
Appendix 14.2 Carbon Calculator Output
Figure 2.1 Site Layout Plan – Proposed Changes
Figure 2.3 Wider Site Layout Plan
Figure 8.1.1 Viewpoints with ZTV
Figure 8.2.1 Viewpoint 1 – Track to Loch Liath Location Plan
Figure 8.2.2 Viewpoint 1 - Track to Loch Liath
Figure 8.3.1 Viewpoint 2 – Old Bridge, Invermoriston
Figure 8.3.2 Viewpoint 2 – Old Bridge, Invermoriston
Figure 8.4.1 Viewpoint 3 – Meall Fuar-mhonaidh
Figure 8.4.2 Viewpoint 3 – Meall Fuar-mhonaidh
Figure 8.5.1 Viewpoint 4 – Achtuie Road near Creag Nay
Figure 8.5.2 Viewpoint 4 – Achtuie Road near Creag Nay
Figure 8.6.1 Viewpoint 5 – Suidhe Viewpoint, B862
Figure 8.6.2 Viewpoint 5 – Suidhe Viewpoint, B862
Figure 8.7.1 Viewpoint 6 – Summit by Suidhe Viewpoint, B862
Figure 8.7.2 Viewpoint 6 – Summit by Suidhe Viewpoint, B862
Figure 8.8.1 Viewpoint 7 – B862 South of Foyers
Figure 8.8.2 Viewpoint 7 – B862 South of Foyers
Figure 8.9.1 Viewpoint 8 – Lochside picnic layby on B852
Figure 8.9.2 Viewpoint 8 – Lochside picnic layby on B852
Figure 8.10.1 Viewpoint 9 – Carn na Saobhaidhe
Figure 8.10.2 Viewpoint 9 – Carn na Saobhaidhe
Figure 8.11.1 Viewpoint 10 – Great Glen Way near Carn a’Bhodaich
Figure 8.11.2 Viewpoint 10 – Great Glen Way near Carn a’Bhodaich
Figure 8.12.1 Viewpoint 11 – Meall Mor, Glen Affric
Figure 8.12.2 Viewpoint 11 – Meall Mor, Glen Affric
Figure 8.13.1 Viewpoint 12 – Creag Dhubh
Figure 8.13.2 Viewpoint 12 – Creag Dhubh
Figure 8.14.1 Viewpoint 13 – Sgurr nan Conbhrairean
Figure 8.14.2 Viewpoint 13 – Sgurr nan Conbhrairean
Figure 8.15.1 Viewpoint 14 – Meall Dubh
Figure 8.15.2 Viewpoint 14 – Meall Dubh
Figure 8.16.1 Viewpoint 15 – Poll-gormack Hill
Figure 8.16.2 Viewpoint 15 – Poll-gormack Hill
Figure 8.17.1 Viewpoint 16 – Geal Charn
Figure 8.17.2 Viewpoint 16 – Geal Charn
Figure 8.18.1 Viewpoint 17 – B862 south of Dores
Figure 8.18.2 Viewpoint 17 – B862 south of Dores
Figure 8.19.1 Viewpoint 18 – Track near Dun Fhamhair fort
Figure 8.19.2 Viewpoint 18 – Track near Dun Fhamhair fort
Figure 8.20.1 Viewpoint 19 – Path north of Loch Affric
Figure 8.20.2 Viewpoint 19 – Path north of Loch Affric
Figure 8.21.1 Viewpoint 20 – Path north of Affric Lodge
Figure 8.21.2 Viewpoint 20 – Path north of Affric Lodge
Figure 8.22.1 Viewpoint 21 – Toll Creagach
Figure 8.22.2 Viewpoint 21 – Toll Creagach
Figure 8.23.1 Viewpoint 22 – Sgurr na Ruaidhe
Figure 8.23.2 Viewpoint 22 – Sgurr na Ruaidhe
Figure 8.24.1 Viewpoint 23 – An Cabar (Ben Wyvis)
Figure 8.24.2 Viewpoint 23 – An Cabar (Ben Wyvis)
Figure 8.25.1 Viewpoint 24 – NCN1 Between Dingwall and Evanton
Figure 8.25.2 Viewpoint 24 – NCN1 Between Dingwall and Evanton
Figure 8.26.1 Viewpoint 25 – Minor road near Tore
Figure 8.26.2 Viewpoint 25 – Minor road near Tore
Figure 8.27.1 Viewpoint 26 – A87 Bun Loyne
Figure 8.1.1 - Viewpoints with ZTV (15 Turbine Layout)
Figure 8.1.2 – Comparative ZTV – 15 Turbine Layout with 18 Turbine Layout
Figure 8.1.3 – Cumulative ZTV – 15 Turbine Layout with the Operational Development
Figure 1a Viewpoint 3 Meall Fuar-mhonaidh Location Plan
Figure 1b-c Viewpoint 3 Meall Fuar-mhonaidh (15 Turbine Layout)
Figure 1d-f Viewpoint 3 Meall Fuar-mhonaidh (15 Turbine Layout)
Figure 2a Viewpoint 5 Suidhe Viewpoint, B862 Location Plan
Figure 2b-c Viewpoint 5 Suidhe Viewpoint, B862 (15 Turbine Layout)
Figure 2d-f Viewpoint 5 Suidhe Viewpoint, B862 (15 Turbine Layout)
Figure 3a Viewpoint 6 Summit by Suidhe Viewpoint, B862 Location Plan
Figure 3b-c Viewpoint 6 Summit by Suidhe Viewpoint, B862 (15 Turbine Layout)
Figure 3d-f Viewpoint 6 Summit by Suidhe Viewpoint, B862 (15 Turbine Layout)
Figure 4a Viewpoint 7 B862 south of Foyers Location Plan
Figure 4b-c Viewpoint 7 B862 south of Foyers (15 Turbine Layout)
Figure 4d-f Viewpoint 7 B862 south of Foyers (15 Turbine Layout)
Figure 5a Viewpoint 11 Meall Mor, Glen Affric Location Plan
Figure 5b-c Viewpoint 11 Meall Mor, Glen Affric (15 Turbine Layout)
Figure 5d-f Viewpoint 11 Meall Mor, Glen Affric (15 Turbine Layout)
Figure 6a Viewpoint 12 Creag Dhubh Location Plan
Figure 6b-c Viewpoint 12 Creag Dhubh (15 Turbine Layout)
Figure 6d-f Viewpoint 12 Creag Dhubh (15 Turbine Layout)
Figure 7a Viewpoint 17 B862 south of Dores Location Plan
Figure 7b-c Viewpoint 17 B862 south of Dores (15 Turbine Layout)
Figure 7d-f Viewpoint 17 B862 south of Dores (15 Turbine Layout)
Benefits of the Proposal
SSE Renewables has recently published the document “Generating Benefits in the Great Glen”. This outlines that clean, renewable electricity generation, projects in the Great Glen in the north of Scotland – Stronelairg wind farm, Bhlaraidh wind farm, Dunmaglass wind farm and Glendoe hydro station – have delivered significant investment and good quality jobs in the local area and across Scotland and the UK. This report shows the economic contribution of these projects through their development, construction, operations and maintenance, with analysis undertaken by BiGGAR Economics. It also tells the story of wider socio-economic benefits of the projects, including a number of case studies showing the positive impacts on the people and business from activities in the local area.
The illustration below provides an outline of the economic benefit of these projects to the Great Glen. The report can be read and downloaded on our News and Views page.

Contact us
If you have any queries or wish to speak with the project team, please contact:
Eilidh Edgar, Stakeholder Engagement Manager
Email: Eilidh.Edgar@SSE.com
Phone: 07879992917